why make this recipe
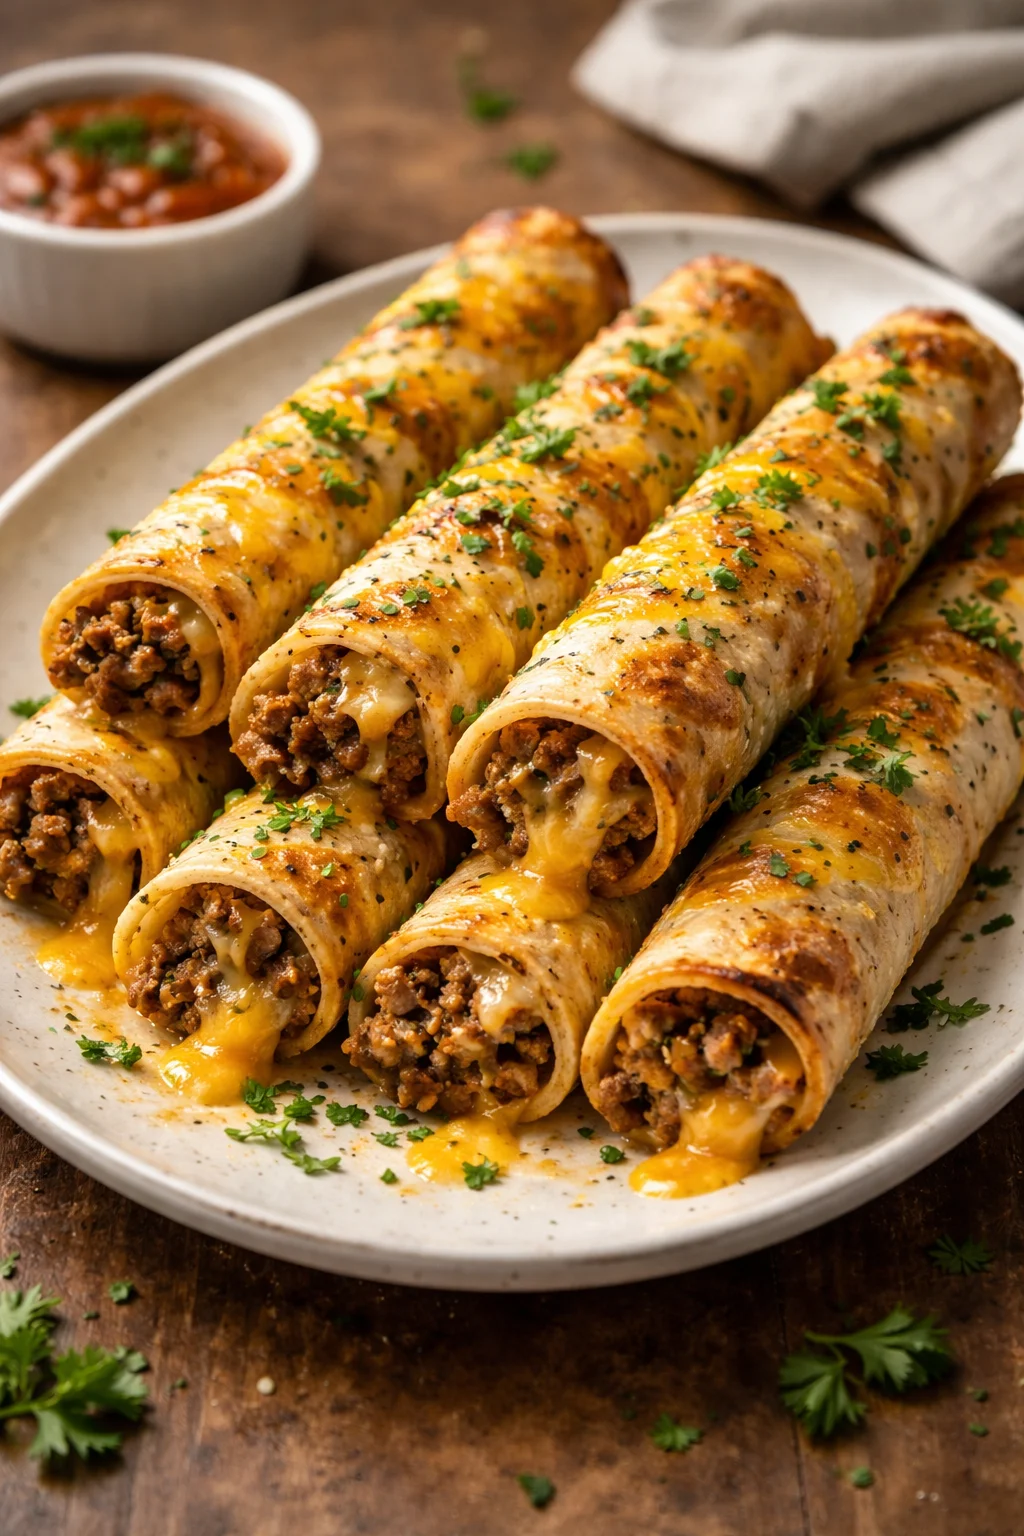
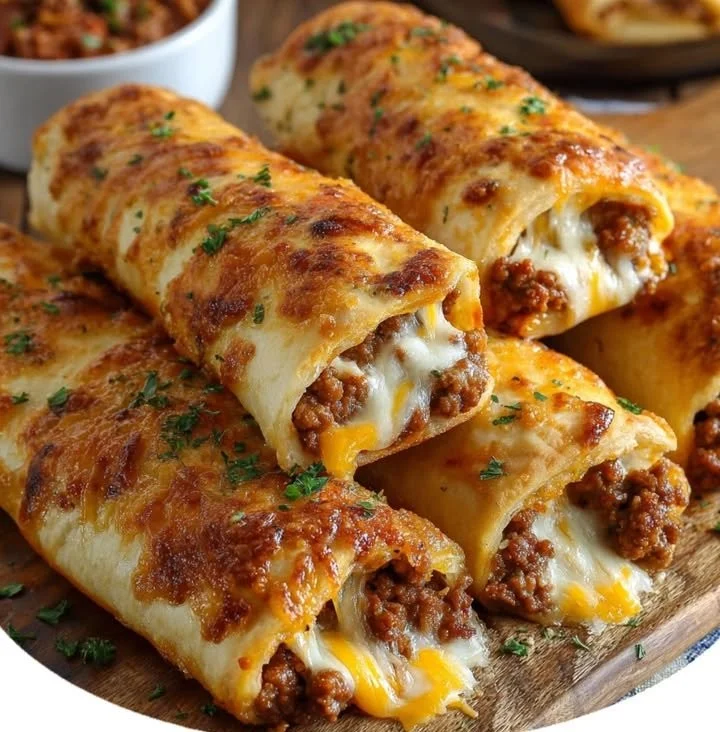
Cheesy Taco Breadsticks are a fun, hands-on twist on two party favorites: taco filling and cheesy bread. They’re quick to assemble, easy to customize, and perfect for game day, weeknight dinners, or kid-friendly lunches. If you enjoy hearty, cheesy snacks with bold Mexican-inspired flavors, this recipe delivers big on comfort and convenience.
introduction
This recipe takes store-bought pizza dough and transforms it into handheld, cheesy taco-filled breadsticks that are crispy on the outside and gooey inside. It’s a great way to use ground beef and taco seasoning in a new format, and it pairs well with salsa, guacamole, or sour cream. For another casserole-style taco idea that complements this flavor profile, check out cheesy taco potatoes.
how to make Cheesy Taco Breadsticks
Follow the simple steps below to turn basic ingredients into a melty, savory snack that everyone will reach for.

Ingredients :
1 lb ground beef, taco seasoning, 1 packet taco seasoning mix or homemade, 1 tube Pillsbury Pizza Dough, garlic butter (for brushing)
Directions :
- Preheat the oven according to pizza dough instructions.
- Cook the ground beef in a skillet over medium heat until browned. Drain excess fat.
- Add taco seasoning and water as per the package instructions. Stir and let simmer.
- Roll out the pizza dough on a floured surface.
- Spread the taco beef mixture evenly over the dough, then sprinkle with cheese.
- Roll the dough tightly and cut into breadstick-sized pieces.
- Place on a baking sheet and brush with garlic butter.
- Bake until golden brown according to the dough instructions.
- Serve warm and enjoy!
how to serve Cheesy Taco Breadsticks
Serve warm straight from the oven with dipping sauces like salsa, sour cream, guacamole, or queso. They make a great appetizer platter when paired with fresh veggies and a simple salad, or serve several per person alongside Mexican rice and beans for a full meal.
how to store Cheesy Taco Breadsticks
Cool completely, then store in an airtight container in the refrigerator for up to 3–4 days. Reheat in a 350°F oven for 8–10 minutes (or until warmed through) to maintain crispiness, or microwave briefly if short on time. For longer storage, freeze cooled breadsticks on a tray, then transfer to a freezer bag for up to 2 months; reheat from frozen in a 375°F oven until heated through.
tips to make Cheesy Taco Breadsticks
- Drain the beef well before adding seasoning to avoid soggy dough.
- Use a sharp knife or twine to cut the roll cleanly into even pieces.
- Brush with garlic butter just before baking for a glossy, flavorful finish.
- Choose a good melting cheese like cheddar or Monterey Jack for the best gooey pull.
- Don’t overfill the dough; too much filling makes rolling difficult and can cause leaks.
variation (if any)
- Swap ground beef for ground turkey, chicken, or a plant-based crumble for dietary preferences.
- Add diced jalapeños or a pinch of smoked paprika for extra heat and smokiness.
- Make a breakfast version by using scrambled eggs, breakfast sausage, and cheddar.
- Use crescent roll dough for a lighter, flakier texture instead of pizza dough.
FAQ
Q: Can I make these vegetarian?
A: Yes — replace the ground beef with seasoned black beans, lentils, or a meat substitute and cook until heated through.
Q: Can I assemble these ahead of time?
A: You can roll and cut them, then refrigerate on a baking sheet covered with plastic wrap for up to 24 hours before baking.
Conclusion
For a tested version of this idea and extra inspiration, see the Cheesy Taco Breadsticks Recipe by Tasty.